Intro: I moved back to using a notebook daily for my tasks and events. I also use a digital todo list to capture long-term items and a digital calendar because it’s always available and easier to add/search events. I wanted to take some time to document my process in case it’s helpful to others. Also, it helps me catalog how I work so I can review periodically to look for efficiencies. Feel free to comment or ask questions, I’ll do my best to reply!
I’ll detail the setup of the physical part of my system here. We looked at photos of my actual notebook and pens in part one, so this post deals more with the sections, spreads, pages, or whatever you want to call them, that I use in my notebook regularly.
Note: this is part two of a four part series. Part one is available here. Parts three and four are coming soon.
Outline
- Part 1 – Intro
- Components of My System
- My Specific Components
- Notebook
- Pen(s)
- Digital Task List
- Digital Calendar
- Part 2 – Physical
- Notebook Setup
- Index
- Monthly Spread
- Weekly Spread
- Daily Pages
- Journal Pages
- Notebook Setup
- Part 3 – Digital
- Part 4 – Functionality
2.1 Notebook Setup
I started my whole “system” with a fairly traditional Bullet Journal spread. My index and monthly spread are essentially unchanged from what was mentioned in the Bullet Journal book at that time. It’s a worthwhile read for sure! The weekly spread evolved from the One Minute ToDo (1MTD) process that I adapted. And my daily logs are mostly Bullet Journal too … with a little extra information in the header. Read on for details.
2.1.1 Index
I’m not going to spend any time detailing my index. It’s an index. When I get to a new month or write a notable list or collection, I add it to my index. Sometimes I forget to do it for a while, so I try to reconcile it all when the notebook is full and being shelved.
2.1.2 Monthly Spread
Near the beginning of each month, I create a two page spread with the following information:

- Monthly calendar (in a column down the left side of each page) – high-level or important events highlighted
- I let my digital calendar (see part 3) hold all my day-to-day events; the notebook spread is just a quick reference and helps me look at the month as I plan
- Habit tracker – An “X” on the days in which I meditate (M) and/or exercise (E)
- Mood tracker – 1-5 scale to track my mood (M) and energy (E) in the morning
- 1 = bad, 5 = great
- Theme – overall theme I want to consider for the month
- Project(s) – personal and/or work projects to focus on this month
- Date night – my wife and I trade off months planning a date night
- Book(s) finished – I’m challenging myself to read more books more often, so I track which books were completed this month here (and on GoodReads).
This spread utilizes a Post-it tab at the top of the right side. I refer to this page every morning when I track my mood, energy, and any habits I’ve completed.
2.1.3 Weekly Spread
At the end of each week I create my weekly spread. This is a list of all the items I am dedicating my time to work on “this week”. I separate my personal (SLF) and professional (WRK) tasks and goals, but this could easily fit on one page if necessary. I use the following icons on tasks (more on my icons in parts three and four):
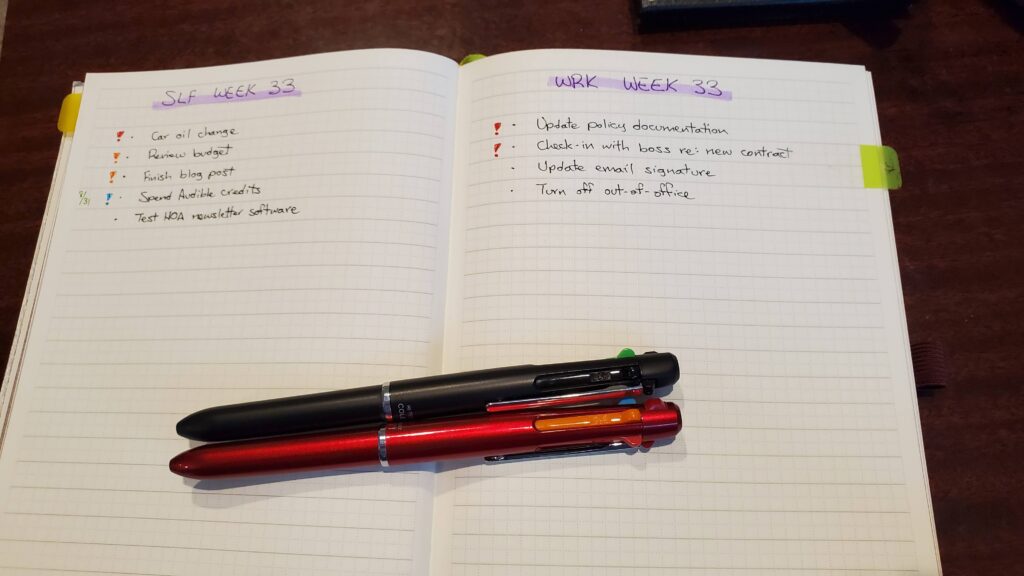
- Red exclamation mark ! = Priority 1 items
- Orange exclamation mark ! = Priority 2 items
- Blue exclamation mark ! = Priority 3 items
- w = waiting for something
- N = new item (for when I reconcile between physical and digital)
- green date (ex: 5/31) = due date
If I complete all the items on this spread, I will visit Todoist and pull a few things from my “Opportunity Now” list. More on that in part three.
This spread utilizes a Post-it tab at the top right side of the notebook, just under the “month” tab at the top. I refer to this page at the end of each day when I setup “tomorrow”.
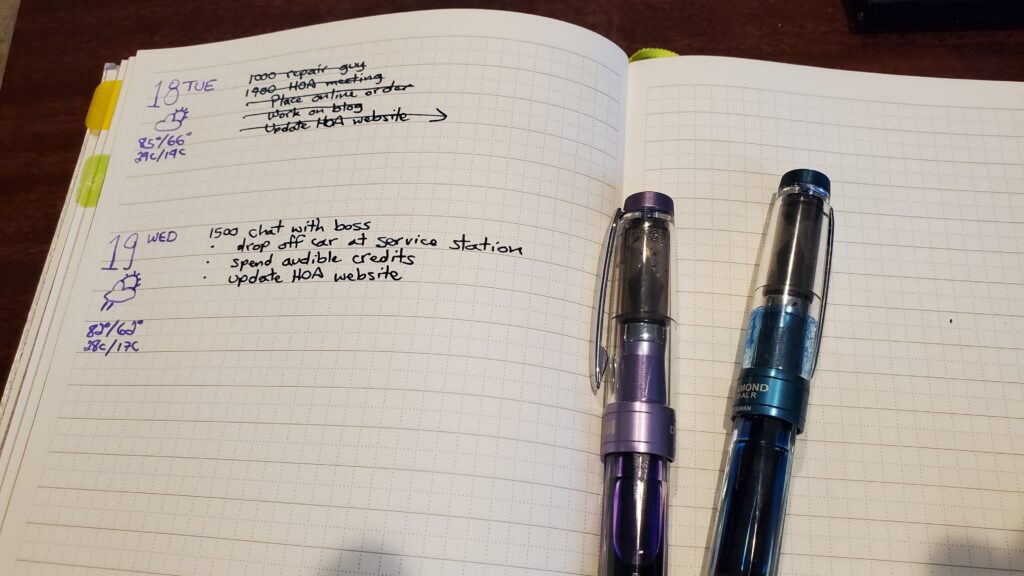
2.1.4 Daily Pages
This is the page that’s open the most. This is how I stay focused every day. I setup each day the night before (usually at the end of my work day). Each day has a “header” on the left side of the page, my scheduled events or appointments, then my tasks for the day. Tasks for the day include routines for that day, tasks due that day but haven’t been completed, and things I’ve decided to spend my time on.
The header has the date, a weather icon, the high and low temps in both F and C.
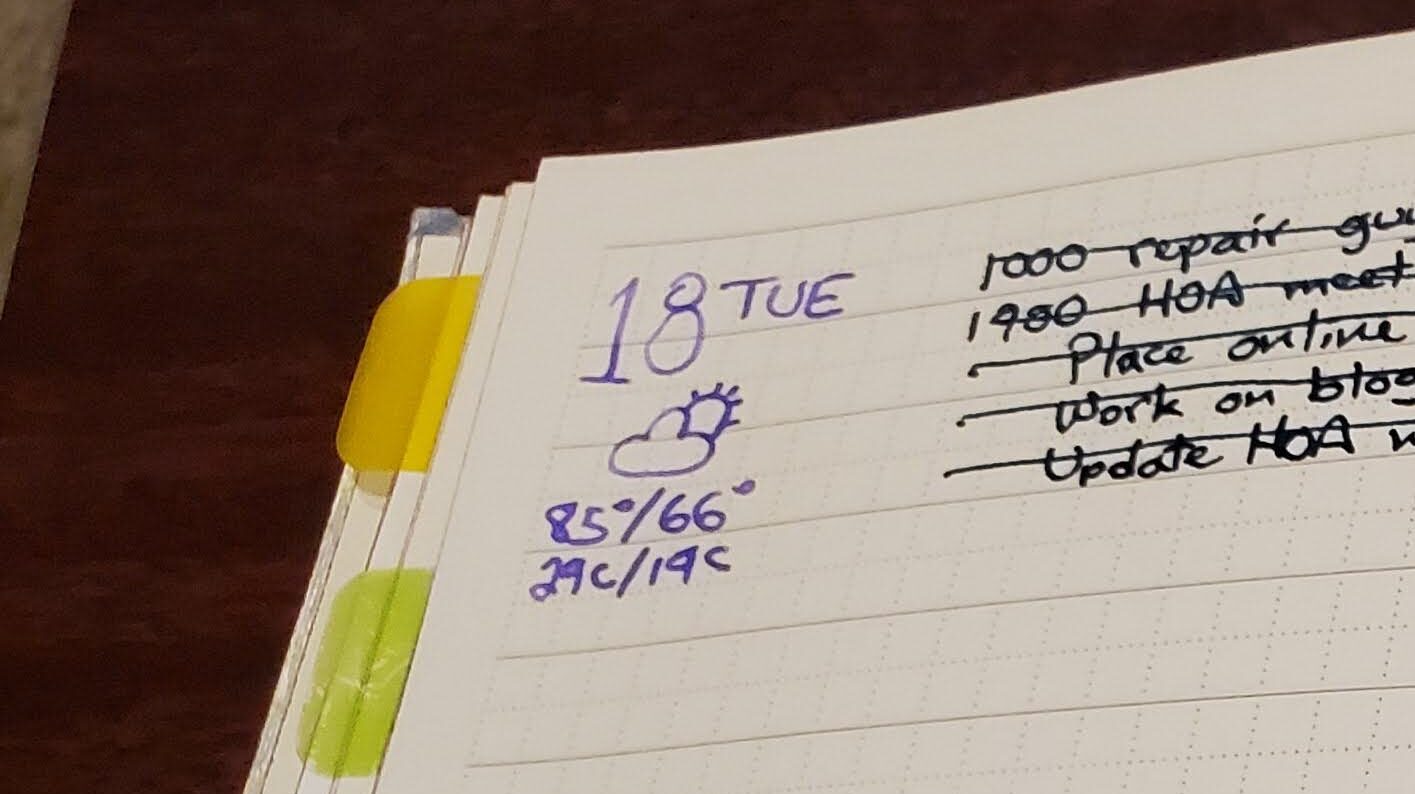
The task area starts with the scheduled events and appointments I know about (I get quite a few events scheduled that day, which I add to the bottom of the list). Then I pull routine tasks (listed on my calendar), then any tasks forwarded from the day before, then any other tasks pulled from my Weekly Spread that I want to work on that day.
I’ll go into more details on how I mark things and use these daily pages in part four.
These pages utilize a Post-it tab at the bottom right side of the notebook, just above the page number. My notebook typically sits open to these pages on my desk throughout the day.
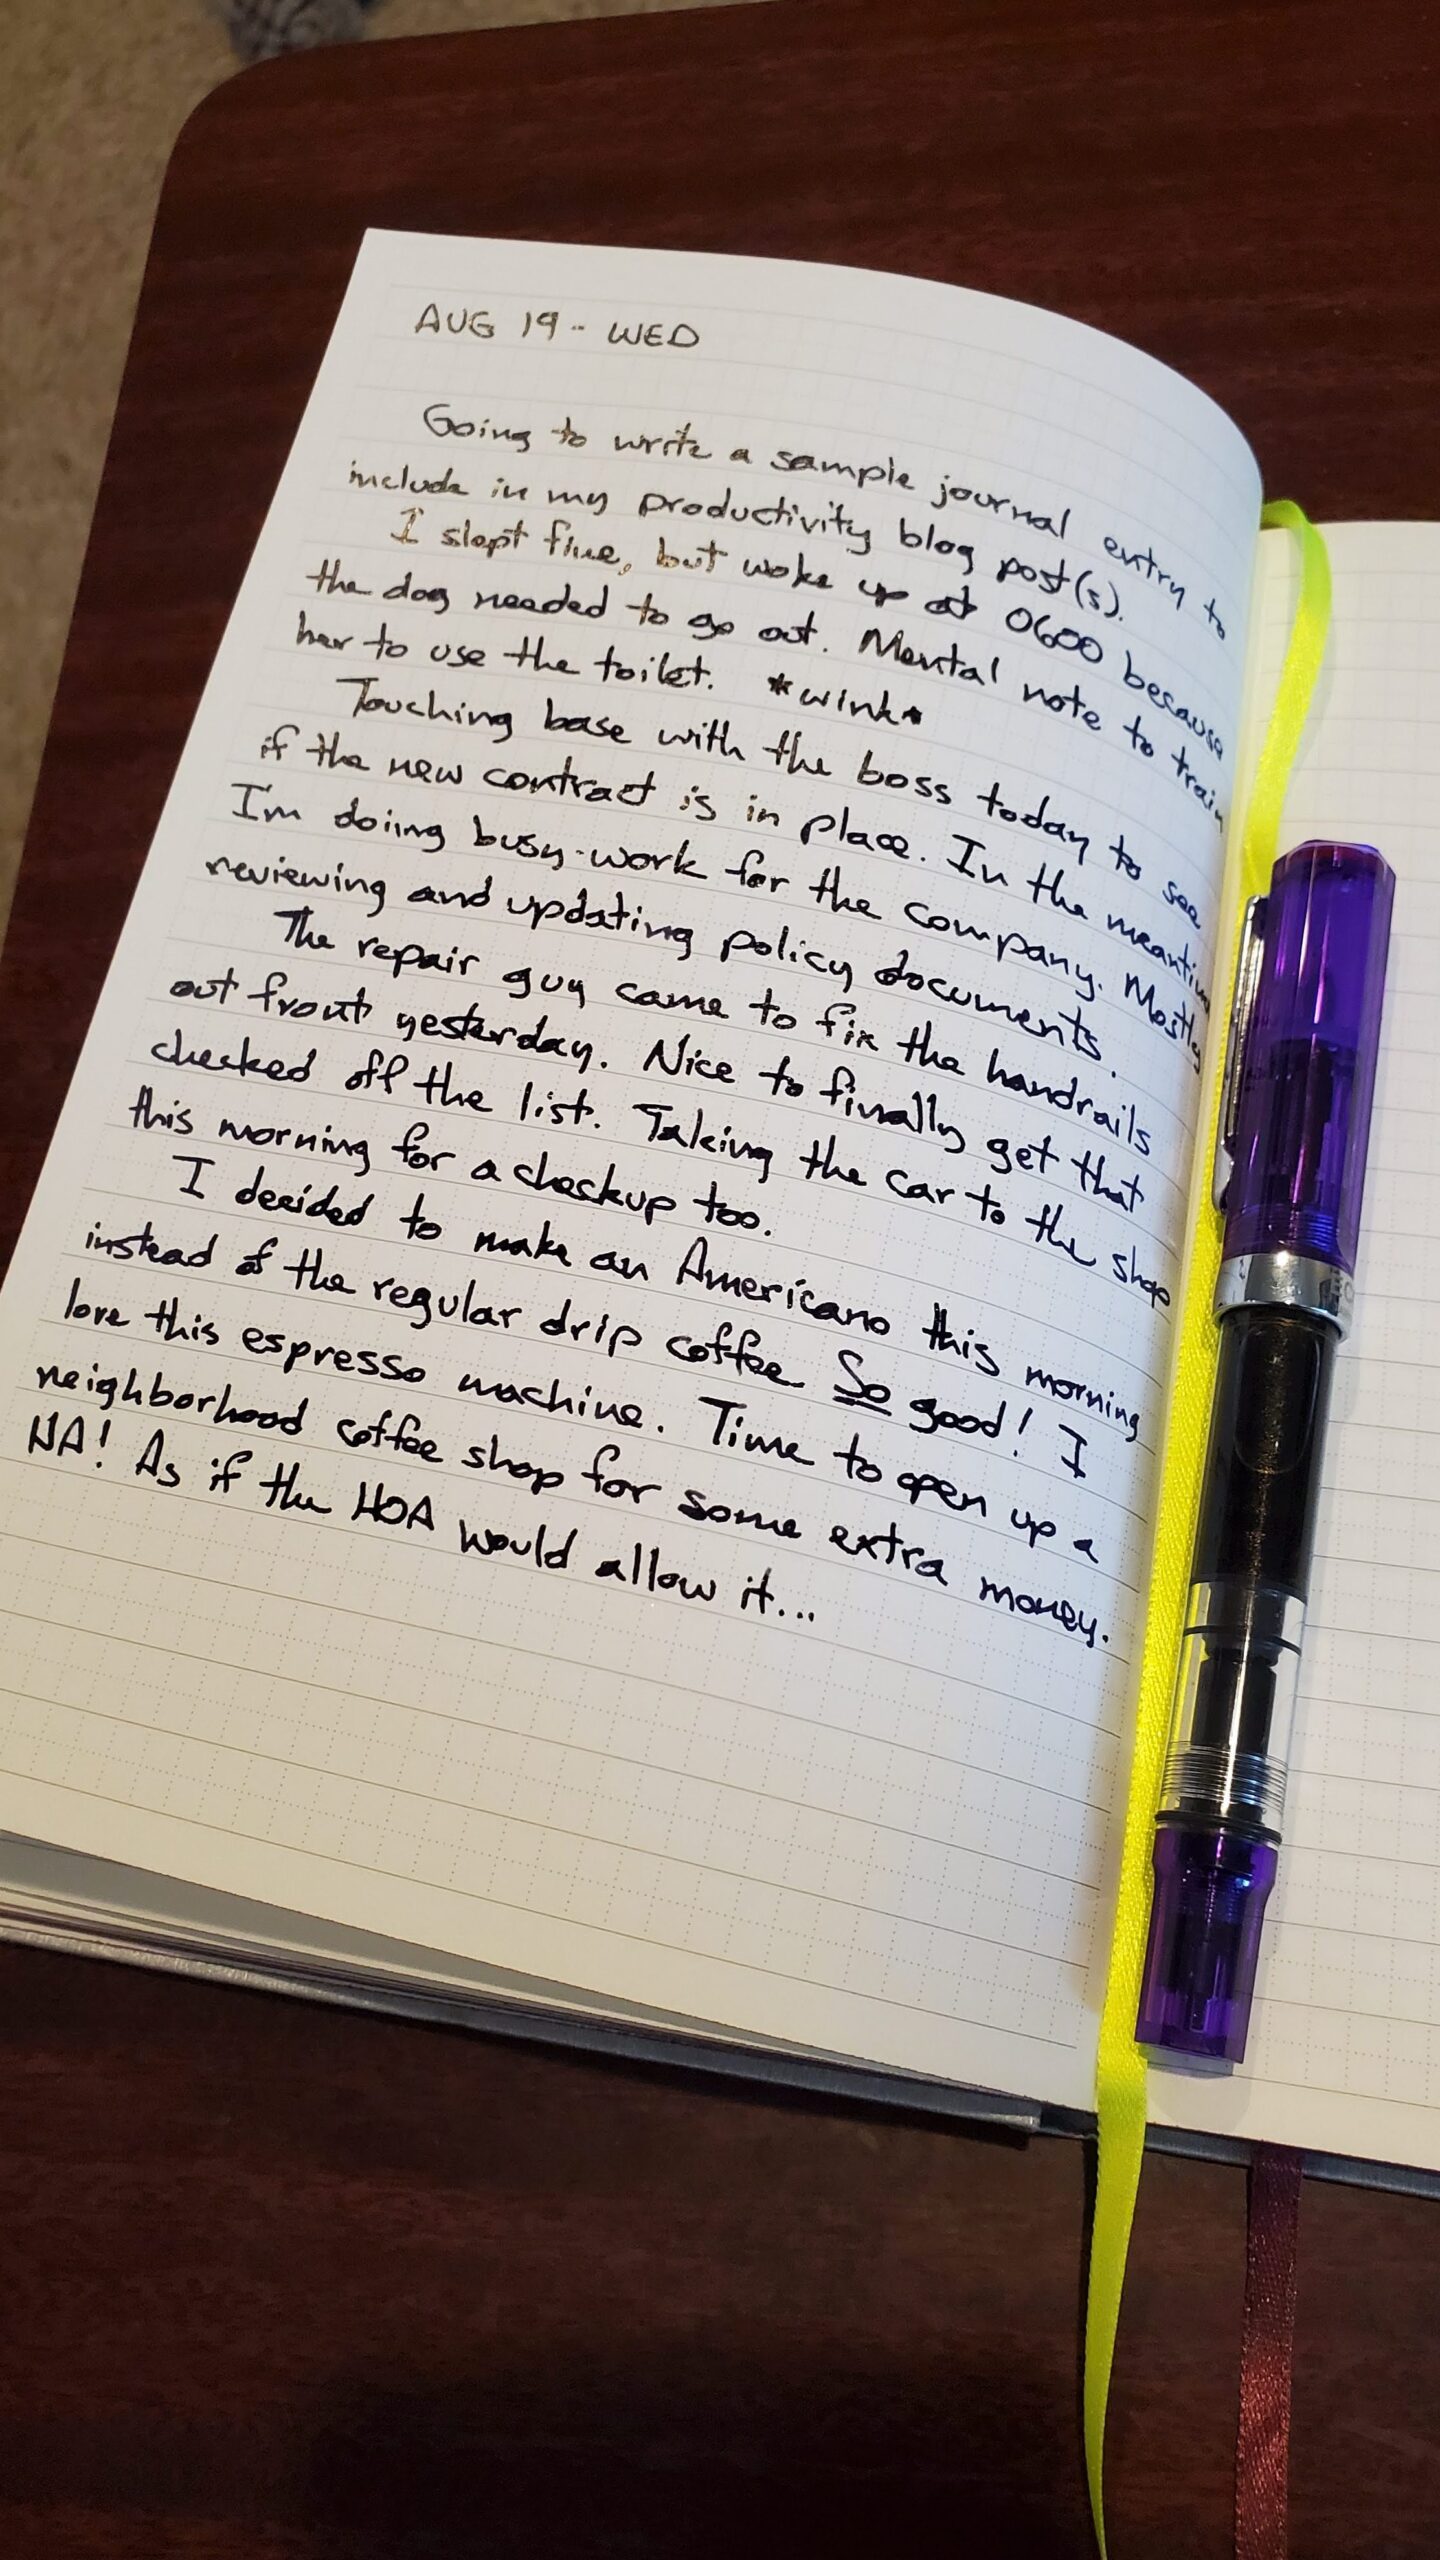
2.1.5 Journal Pages
I started writing in my journal regularly several years ago. At that time it was just keeping a little list of things that happened throughout the day and it was all digital using Journey. This year I decided to actually utilize my notebooks more and be more mindful, so I moved to a physical journal. I love Journey and if I ever go back to strictly digital, I’ll continue using it regularly.
My first few weeks of writing in a physical journal, I actually used a separate notebook. The thinking was that I would want all of my journal entries in one place. It quickly became a pain keeping two notebooks together. I decided to just journal “in-line” with my other pages since, like my journal, those other pages represent a portion of my life. So now, the next empty page becomes the next page used for writing. It doesn’t matter if it’s for a Monthly Spread, Weekly Spread, Daily Pages, or a Journal entry. It ends up flowing pretty well so that I have a Weekly Spread followed by some Daily Pages followed by the related Journal entries.
The next blank page is marked with the notebook’s bookmark. If I ever end up using a notebook that doesn’t have a bookmark, I’ll just use a different colored Post-it tab.
Part 2 Conclusion
As I’ve mentioned above (and you’ll see in more detail in part four), everything throughout the notebook is marked with a tab or bookmark to easily find the active section I need. So there’s no “searching” for anything.
I know it seems like a lot of stuff all over the place, but it makes sense … eventually. Part 3 I’ll delve into my digital tools and part 4 I’ll try to put everything together with some handy little flowcharts and stuff too. You’ve already made it this far. Stick with me and hopefully you’ll get something useful out of this!
[…] this is part one of a four part series. Part two is available here. Parts three and four coming […]